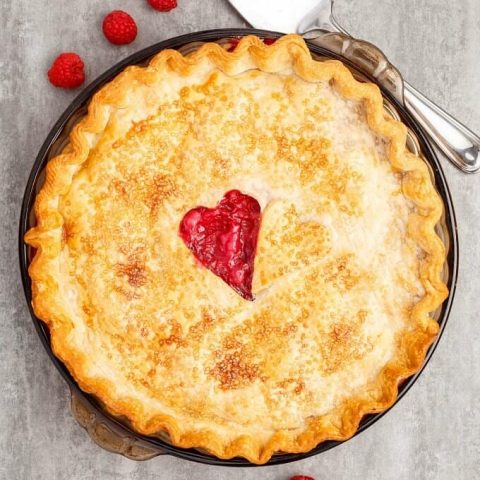
All the other pies get so much love, but what about this homemade raspberry pie?! Well, let's just say, raspberry pies will be happening much more often now!
Sorry for being late with the last two posts!
Usually writing comes easy to me, but as of late, I am finding the actual blog posts to be the most challenging part of blogging. Sure, I create a recipe, but it needs a story to go along with it!
The story for this homemade raspberry pie is easy! My husband loves blueberry pie and I made that for Thanksgiving dinner (I actually made Little Sweet Baker's Homemade Blueberry Pie recipe and it was absolutely delicious!!!) But his birthday wasn't too far after the holiday and I did not want to make another blueberry pie (I am sure he would have been happy with that!) So I went with a raspberry pie because, in my mind, it had to be just as good as blueberry pie!
And it is!!!
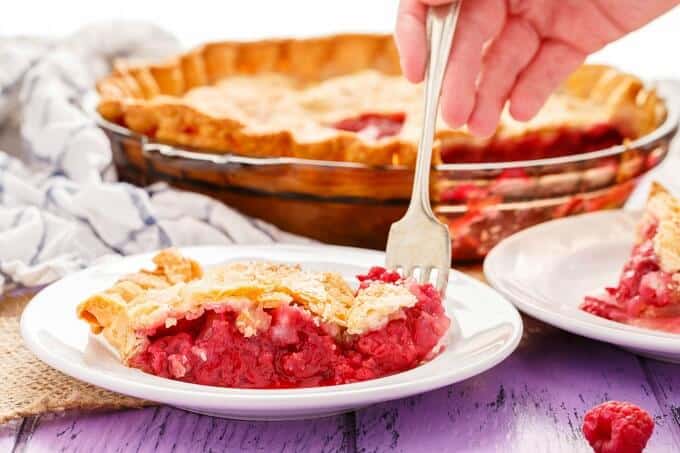
The color is stunning, and the flavors are bold! Depending on your raspberries, the sugar ratio will change. I found my raspberries kind of bland in flavor (at least the one package I tried!) so I thought less sugar would be good. Turns out, you should try some raspberries in each pack as when I ate some for a snack, I was rewarded with sour raspberries! Needless to say, the pie had a tart taste (which worked for us! But if you don't like sour, I suggest more sugar, lol.)
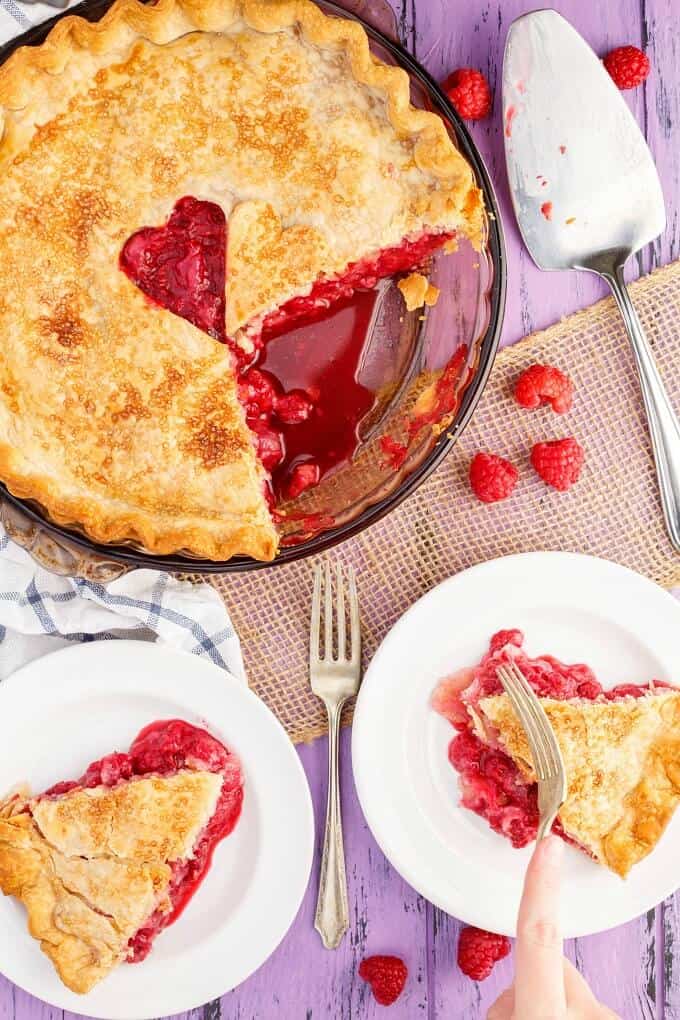
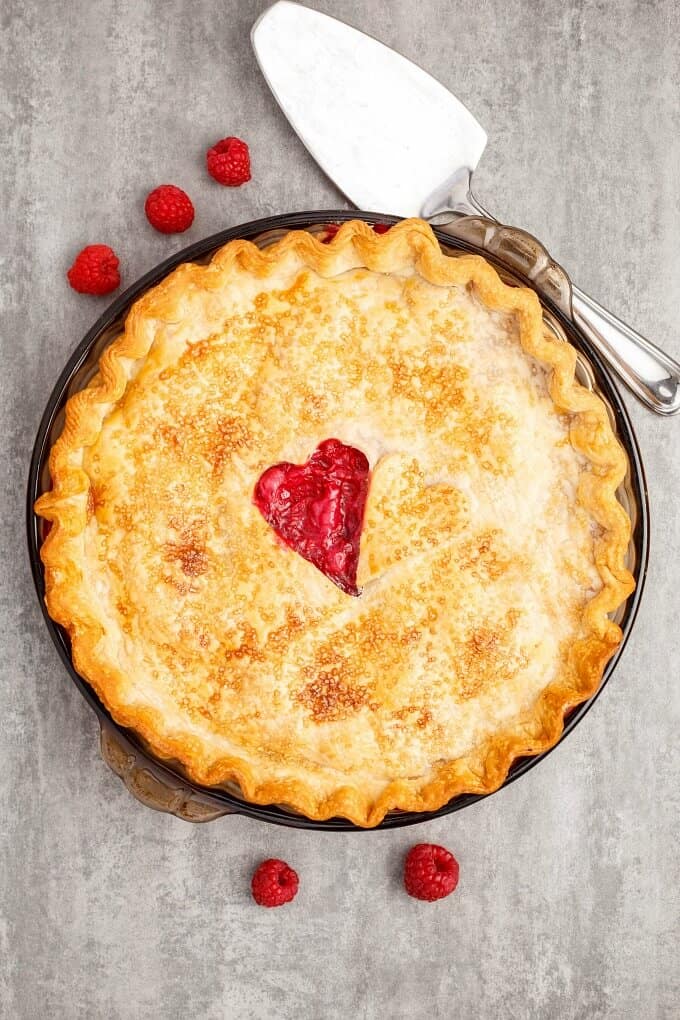
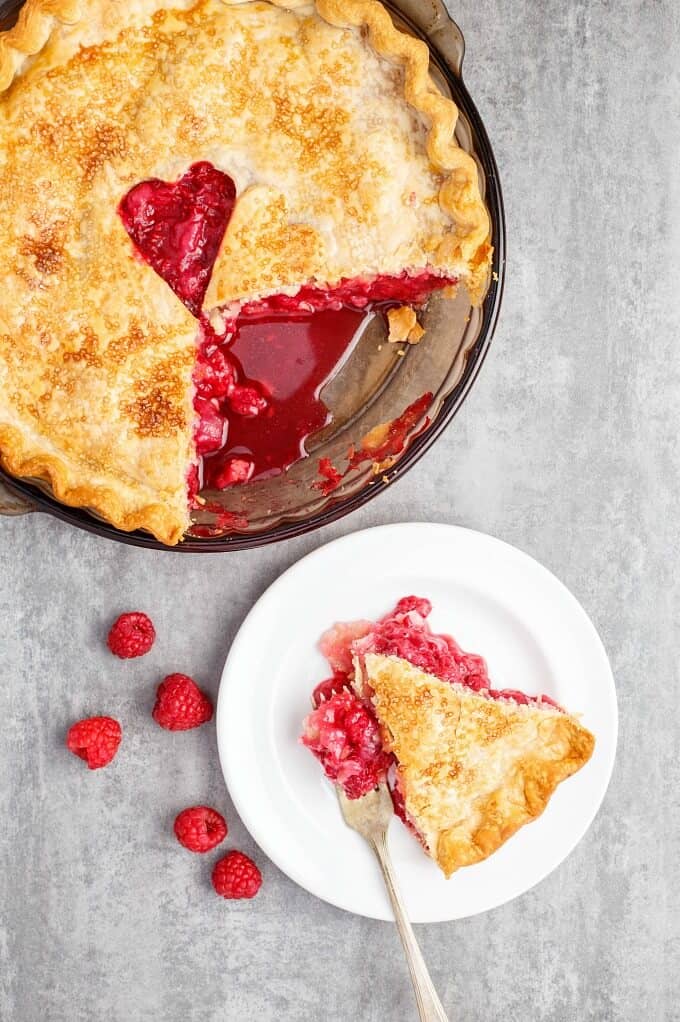
Being the romantic I am, and wanting to show off the beautiful filling color of this raspberry pie, I went with a simple pie crust design!
I actually did not have a small enough heart cookie cutter so I used the bottom of one of my Wilton cake decorating tips and a paring knife to cut out the heart shape. This did the job!
As for pie making, this one is an easy recipe. You will notice a bit of liquid in the filling, but honestly, the filling held up really well. Let it cool completely before slicing (I'll admit, I did not do this here as I was running out of sunlight to take pictures!)
The freshly squeezed lime juice is optional but does bring out the tartness of the raspberries. I honestly love lime and raspberry together so for me, lime is essential! However, it will not be missed if you skip this step 🙂
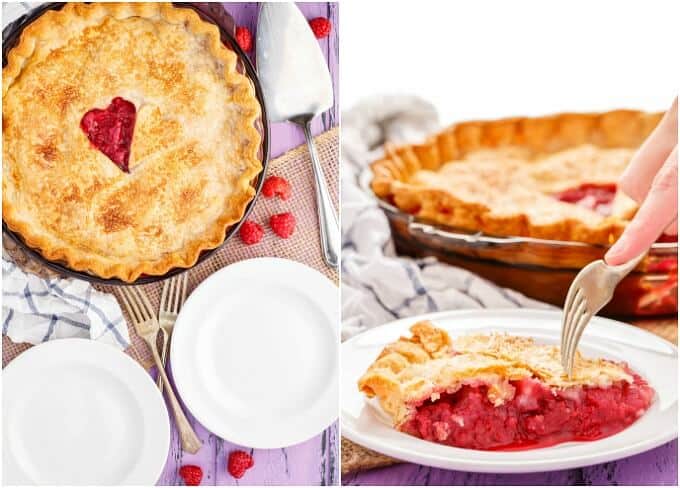
Lastly, while I did make this for my husband's birthday and he basically got the entire pie to himself, this raspberry pie recipe is perfect for Valentine's Day or any holiday get-together! Showcase that beautiful red filling by making a lattice pie design. I regret hiding behind a large layer of pie crust!
📖 Recipe
Homemade Raspberry Pie
Apple pie and pumpkin pie get all the love during the fall season! But this homemade raspberry pie will have you singing a different tune!
Ingredients
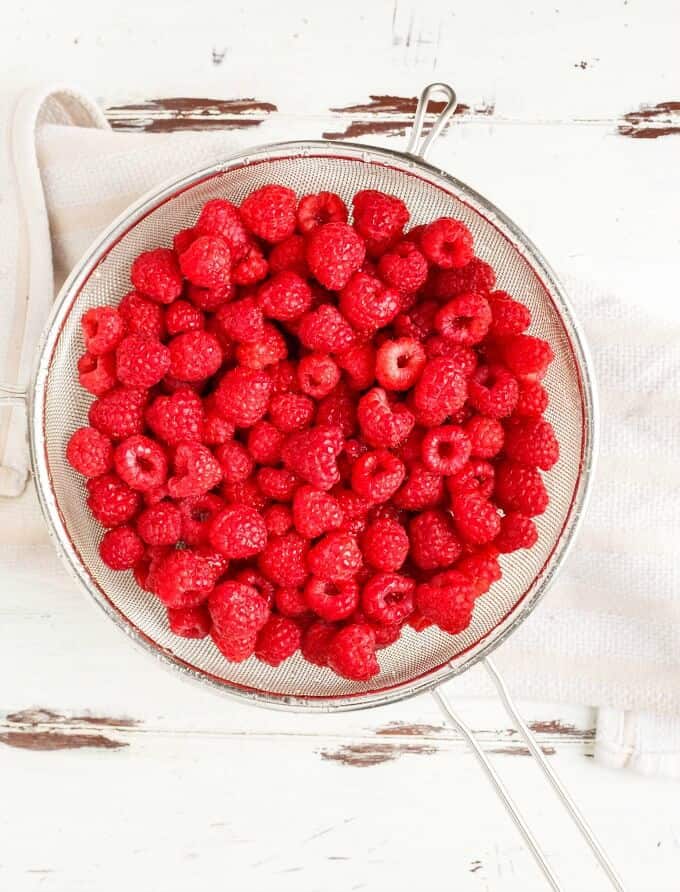
- 700 g fresh raspberries, washed and pat dry (I used 4 (170 g each) containers.)
- ½ cup all-purpose flour
- ½ cup granulated sugar (you can adjust this to suit your needs: tarter raspberries may need more; sweeter raspberries may need less!)
- ¼ tsp. ground nutmeg
- 2 tsp. freshly squeezed lime juice (optional but recommended for tart flavors!)
- 1 homemade pie crust recipe (2-layers) or your favorite store-bought recipe (I suggest Lily's pie crust!
- 1 egg
- ½ tsp. water
- 1 tsp. turbinado sugar
Instructions
- Preheat oven to 425F.
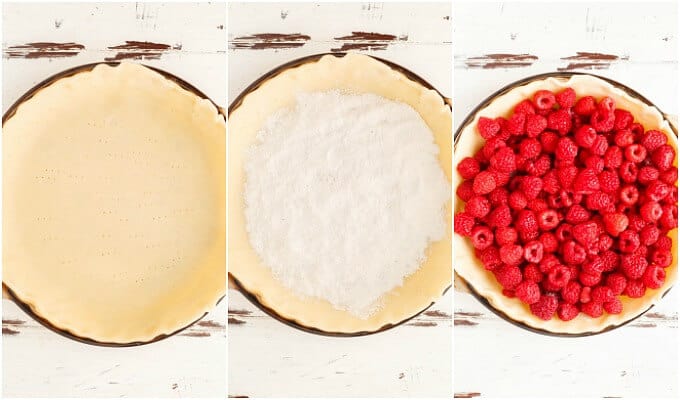
- Roll out one half of pie crust and place into bottom of 9-inch pie dish.
- Combine flour, sugar, and nutmeg in a small bowl. Sprinkle enough of the flour mixture onto the bottom layer of pie crust to cover the entirety of it. This will help prevent a soggy crust.
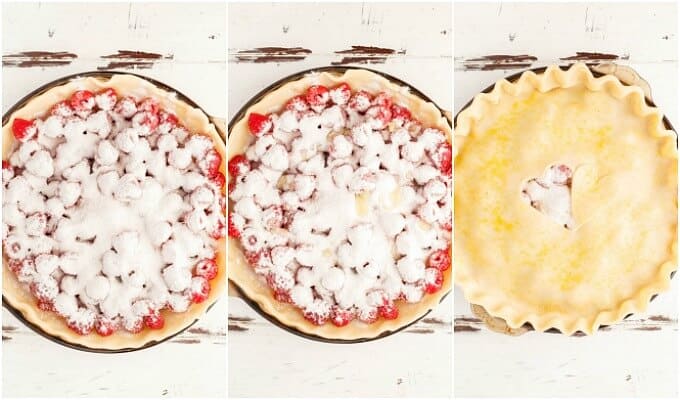
- Pour raspberries on top and cover fruit with remaining flour mixture. Drizzle lime juice over top.
- Cover with remaining pie dough and design accordingly (you can use cookie cutters, do a lattice design, or just keep it simple. Remember to cut some air hole slits if you do cover the entire pie with a solid layer of dough.)
- Whisk egg and water together. Brush onto crust and sprinkle with turbinado sugar.
- Place into oven and bake for 15 minutes. Reduce heat to 375F and continue baking until crust is golden and filling is bubbling, about 35 minutes. I cover my crust edges after the first 15-20 minutes of cooking to prevent burning.
- Allow to cool completely before slicing and serving. You can always reheat your slice when you serve it if you perform warmer pies 🙂
Notes
Adding a few more (or less!) raspberries won't harm your pie so don't fret too much if you are off by a bit. You can use frozen raspberries here, however, make sure you defrost them first and get rid of any excess water.
Nutrition Information:
Yield: 8 Serving Size: 1Amount Per Serving: Calories: 232Total Fat: 7gSaturated Fat: 2gTrans Fat: 0gUnsaturated Fat: 4gCholesterol: 23mgSodium: 100mgCarbohydrates: 41gFiber: 7gSugar: 18gProtein: 4g
Love this homemade raspberry pie?! Try some of these recipes:
Xoxo.4191
😍 delicious I would like to practice this recipe I love it❤ thanks for sharing this amazing recipe
Melani
Wow ,a great recipe. I luv it and aloso made it
Tracie Cooper
I love raspberries-one of my most favorite fruits EVER! I would love to make this pie for my family!
Lura Buckley
Looks delicious 😋
Piroska
This looks so delicious! I love fruit pies that are made with fresh fruit. Raspberries have such a beautiful colour.
Antoinette M
I prefer the red raspberrries in the pie. Looks absolutely delicious!
Donna Porter
This raspberry pie looks delicious. I love all types of fruit recipes!