I have not done a theme week in a while, so today begins a new journey! Say hello to lentils week! Lentils are nutritious, easy to work with, and perfect for vegetarian and vegan meals (as well as gluten-free!)
For day one I thought I came up with the most original idea ever!
I still think it is pretty darn original, even though it seems like my homemade lentil flour is actually a "thing." Lentil flour is used in Indian cooking, though I was not even aware of that during my entire process of making homemade lentil flour and then baking with it. But the research on the topic was interesting and I found out that lentil flour is typically used in bread making. I will definitely have to try homemade lentil flour bread in the future!
The reason I wanted to make homemade lentil flour... well, there are many reasons. The main reason being that gluten-free diets are a big deal these days, and since my mother-in-law suffers from Celiac, I am always looking at new and creative recipes for her. Generally speaking, a lot of gluten-free baking recipes include multiple flours, and some people do not want to go through the hassle of buying 5 different flours to make a recipe. I know my mother-in-law sure doesn't! This being said, I have tried mixes such as Robin Hood's Nutri Flour Blend (gluten-free) and while surprisingly easy to work with, it can be kind of pricey. So my journey began to try and invent a new flour!


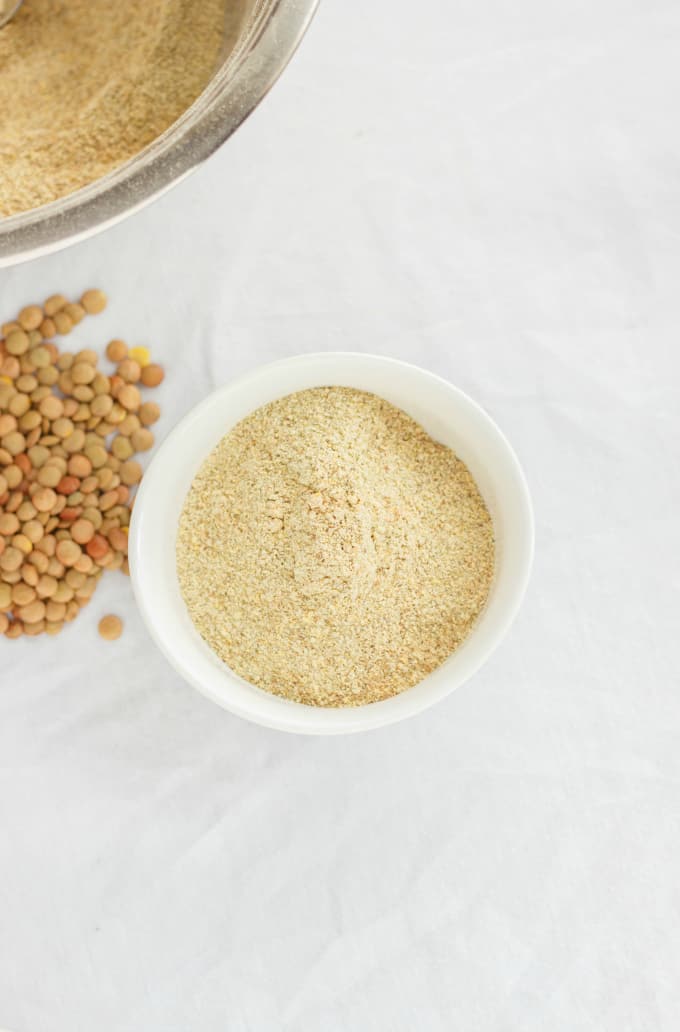
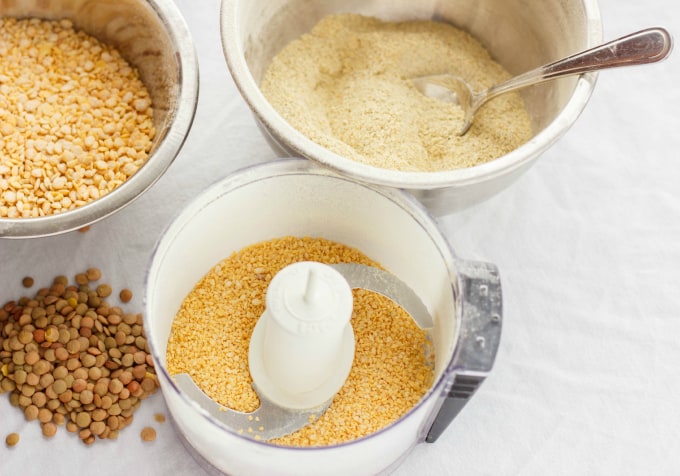
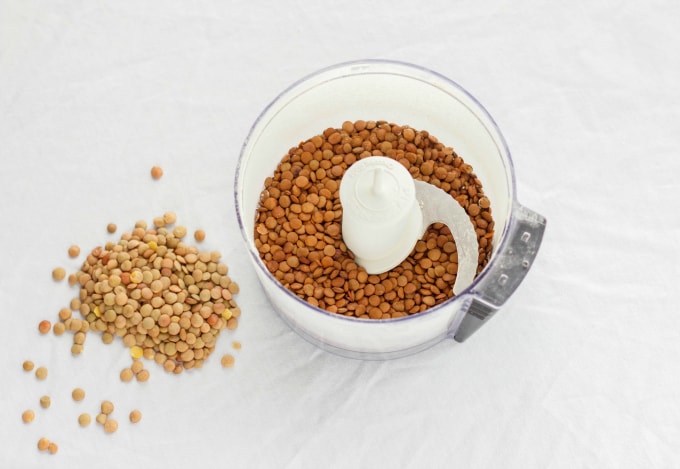
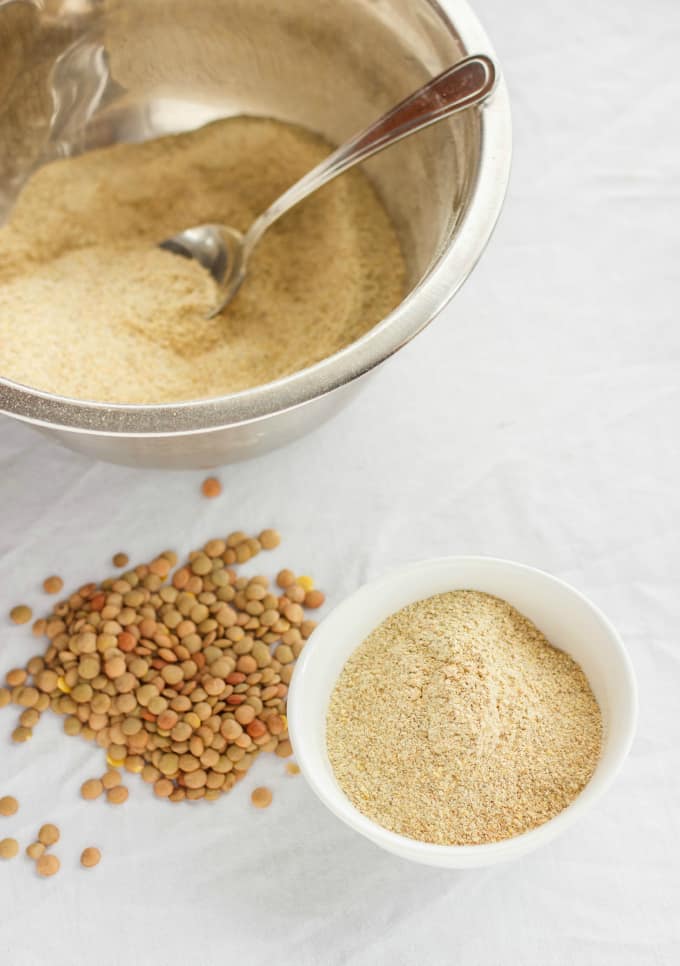
This tutorial for homemade lentil flour is VERY simple. If you have a food processor, you are good to go. I made my flour two ways, and then combined them. I processed enough un-toasted green lentils to equal out 1 cup of lentil flour. I then roasted some lentils in the oven for about 15 minutes and then processed them, creating roughly ½ cup of toasted lentil flour. I then combined the two flours.
Now why did I do this? No real reason. Personally, the roasted lentils really came through in flavor. You could taste them in the baked goods. However, I think using purely toasted lentil flour in cookies might be overwhelming. Mixing the two flours helped create balance, and my cookies came out with this perfect hint of lentil flavor (without anyone actually knowing there were lentils in the cookies!)
📖 Recipe
Homemade Lentil Flour Tutorial
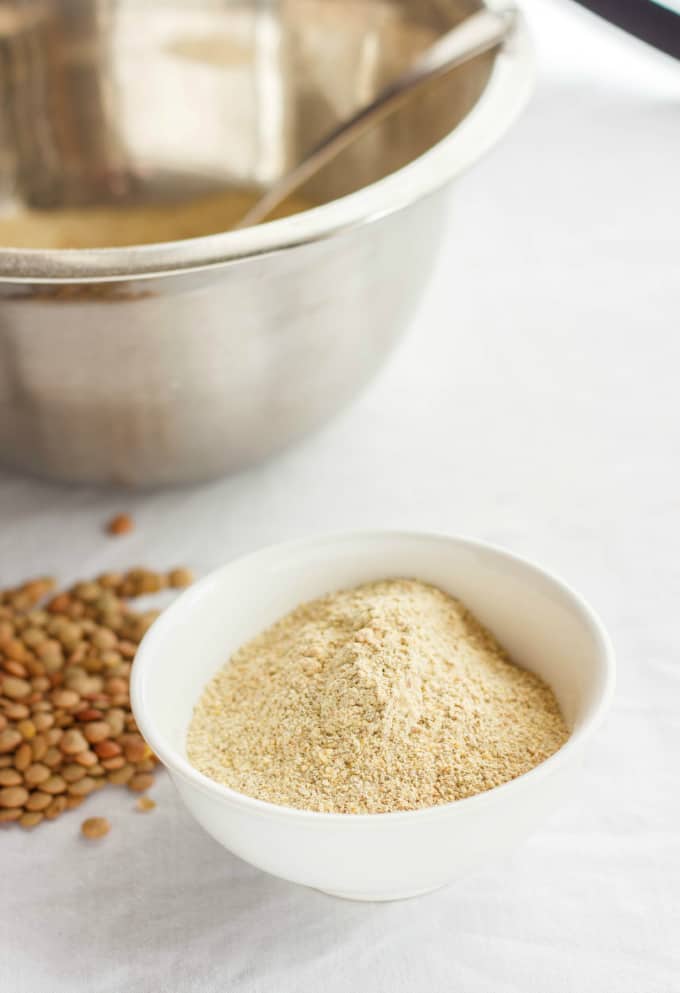
Homemade lentil flour is easy to make, gluten-free, and very healthy. It takes no time at all to make, and can be used in baked goods.
Ingredients
- 3 cups dry lentils of your choosing (I used green.)
Instructions
- You can make this flour two ways.
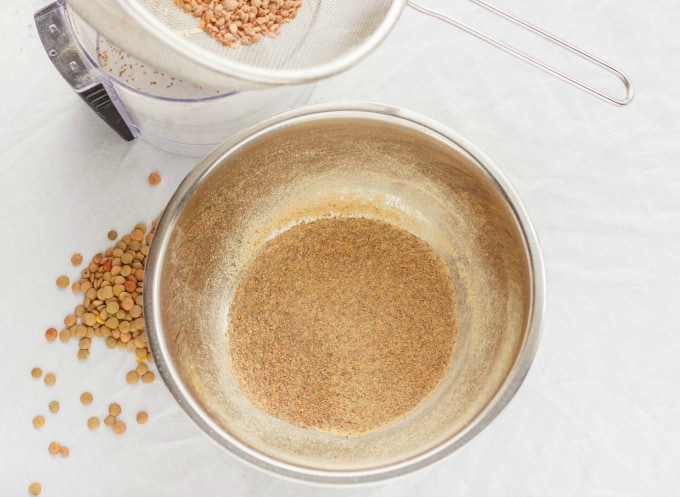
- Leave the lentils un-toasted and transfer to a food processor. Working in batches, process until the lentils resemble a fine powder. There will be some bigger chunks left behind, so make sure to sift through a sieve. Store in an airtight container.
- If you would like to make toasted lentil flour, preheat oven to 400F. Place lentils onto a baking sheet lined with parchment paper or silicone mat. Sort into a single layer.
- Bake for 10 minutes and stir. Bake for an additional 5 minutes if necessary.
- Process like you would the un-toasted lentils.
- *NOTE: Processing these lentils will take some time. Your food processor will probably heat up. Give it a break and step away for 15-20 minutes and process some more. I usually do this over a couple of days.
Nutrition Information:
Yield: 1 Serving Size: 1Amount Per Serving: Calories: 2028Total Fat: 6gSaturated Fat: 1gTrans Fat: 0gUnsaturated Fat: 4gCholesterol: 0mgSodium: 35mgCarbohydrates: 365gFiber: 62gSugar: 12gProtein: 142g
I used green lentils, but as most know, there are red, brown, yellow, and even black lentils! It took some time breaking down the green lentils in my food processor (my machine is only a 3 cup maximum.) I purchased some red lentils to try out with this recipe because they are smaller and I find more split pea in shape. I just happen to always have green lentils on hand because they hold their shape better for my vegetarian meals such as vegetarian meat loaf, vegetarian shepherd's pie, and so on.
So what exactly did I make with my homemade lentil flour? I'll give you a tease with this photo, but you have to come back next tomorrow to get the recipe!

Amy @ A Healthy Life For Me
I have never heard of lentil flour. I am going to have to try this! Thanks for how to!
Kacey
I had never heard of it either 🙂 But I must say, it was fun to work with since it is so completely off the charts!
Hopefulone
I was thinking of adding lentil flour to my oatmeal in the morning to make a complete protein. The lentils in ground form should cook up quickly don,t you think?
Also i may make some unleavened bread "whole wheat or barley flour" and mix some lentil flour to make a complete the protein.
Kacey
They would definitely cook fast, however, they do have a distinct taste so maybe give it a try in small doses. Mixing lentil flour into your bread sounds awesome! I have made bread with lentil flour and it turned out fantastic. I would start with little increments and go from there. I plan to work with lentil flour more often to see what I can come up with.
Becky | The Cookie Rookie
Love this creative and healthy recipe! So excited to try it! Thanks for sharing 🙂
Kacey
I am sure you could whip up something delicious with this recipe, Becky 🙂
Rachael
This is so cool! I love a healthy alternative to white flour !
Kelley
I can't wait to see those cookies! Lentil flour is new to me but I can't wait to see more recipes! Such a great idea
Heather | girlichef
Oh my gosh, I love this! I can't wait to grind my own lentil flour and start baking with it.
Reiko
Lentil flour?! Interesting! I love lentils, so I'm intrigued!! The cookies look tasty!
Sherri@The Well Floured Kitchen
I love different flours! I actually have a grain mill, so now I am super inspired to toss some lentils in and see what happens.
Kacey
I have never used a grain mill before, but it would probably process the lentils faster and more efficiently than a food processor.
Susan Minnich
Lentils would be too soft for the mill. Food processor all the way
Linda @ Veganosity
This is a great idea! I've never heard of lentil flour, but I can imagine that it has a wonderful flavor, and all of the added protein, can it get any better? I'm going to try this. Thank you!
Kacey
I keep "selling" this flour as a great product for gluten-free enthusiasts, but I keep forgetting to include my vegan enthusiasts for that added protein 🙂
Julie @ Tastes of Lizzy T
Thanks for the tutorial! And I just love the simplicity of your photos. Beautiful!
Kacey
Thanks, Julie 🙂
Rachel Farnsworth
I love making Indian food at home. Apparently I really need to make this lentil flour so I can experiment with more authentic Indian flavors!
Kacey
With how easy it is to make (and also very cheap,) you could spend endless hours coming up with some neat recipes!
Kristina
oh, I bet those cookies are GOOD! lentil flour - such a great idea!
Kacey
The cookies were amazing! My daughter gobbled them all up and I don't think she realized the difference in the flour (she is only 3.5 though!)
pam (Sidewalk Shoes)
I'm not a big fan of lentils, but I am intrigued by lentil flour.
Kacey
It is different, that is for sure. I guess you could say it still tastes like lentils, but completely different from actual whole, cooked lentils (texture plays a big role, too.)
Melissa Machowski
I love this! You know this seems like a great way to thicken broth or sauces. I'm totally adding this to my to-do this week! Thanks for sharing this!
Kacey
I am intrigued if that will work! If it does, it would be especially beneficial for gluten-free diets (I might have to give this a try myself!)
Laura
This made me laugh since I clicked over expecting to maybe see dosas lol! Lentil flour in indian flatbreads is terrific! So I am totally down with lentil flour--and super curious to see it in Western baking traditions!
Kacey
I have never tried it in Indian cooking, though I do love the cuisine! Will have to do my research on some Indian flatbreads 🙂
Susan | LunaCafe
What an adventurer you are! 🙂 Looking forward to seeing how you use the flour.
Brianne
God bless you! Ever since I learned about how nutrient rich lentils are, I've been wondering if lentil flour could be used exclusive of other flours in baking. I don't really like to cook at all, or bake experimentally, but I unfortunately have had a life-long love affair w/sugar. Cookies & cake are my biggest weakness. Since I know how our bodies process sugar in any form, as well as flour containing gluten, to fine our bodies a 1-2 punch to our metabolism & insulin levels, etc, I almost never bake or buy these items for our family.
Q: Can I replace all purpose flour in most cookie & cake recipes w/lentil flour? That would be so HUGE for our family! I could then make a low-sugar & nutritious cookie! Oh! And my muffin recipe could become even more nutritious and maybe almost gluten-free! That would be so much more healthy for us! Please let me know what you learned about using lentil flour exclusively in recipes that were not originally developed for a flour other than all-purpose. And many thanks for sharing your hard work!!!
Kacey
First off, thank you so much for the kind words! I will try and answer your questions the best I can. I have not worked too much with lentil flour, but have noticed great results. My homemade lentil flour definitely provides a nutty and almost whole wheat texture to baked goods (I want to say grainy, if you know what I mean.) I don't sub in lentil flour completely because of the issue with graininess (I am used to this with gluten-free baked goods, but some others may not be keen on it.) I see you mention sugar as your issue (mine, too!) If you have a cookie recipe you like, try subbing out maybe 1/4 - 1/2 cup of all-purpose flour and replacing it with lentil flour. This way you are getting the nutrients of the lentil flour without risking destroying your recipe. (I have a cookie recipe that uses sweet potatoes and no flour; it may sound weird but it is great for people looking to watch their sugars and flour intake!)
As I said above, I would try slowly replacing the all-purpose flour a bit at a time with lentil flour. I like to use other gluten-free flours such as coconut flour (I also make my own homemade, just add shredded coconut to a food processor and process until flour-like. It doesn't get as soft as other flours, but it does help keep the graininess down.) I am definitely going to be experimenting with lentil flour some more, and I will email you with any recipes that work! I have had success with bread and cookies, but have not made any cakes with it yet (muffins may be a bit easier because you can add other ingredients to bind the muffin together!) We have a bulk store that carries tons of gluten-free flours such as lentil and coconut, so you can always keep an eye out for them 🙂
Hope this helps!
Dana
Thank you so much for this tutorial. the most cost effective flour in my area is coconut flour (but I loath the flavor of coconut) since lentils are under 2 dollars a bag this is perfect for our budget!
I'm just curious if substituting lentil flour for wheat flour is a 1 to 1 ratio or if it absorbs moisture like some other GF flours out there.
Kacey
Hi, Dana. I have only done one cookie recipe using lentil flour, but it worked out quite well! I explained to another person that I have not experimented much, but plan to. For now, I would not fully replace flours with lentil flour, maybe 1/2 cup at a time. It does absorb quite well, but lentil flour is quite strong in taste, and to me is quite "grainy." Reminds me a lot of whole wheat flour. Hope that helps! I should add, I use a mixture of lentil flour and coconut flour to help balance the flavours!
Jeanna
Thank you so much for posting this! Finally I found the first step in making lentil pasta. I first tried the brand Tolerant a couple months ago. They make lentil pasta but it sells for 8.99-13.99 a pound! It is delicious but I would really like to save some $ while eating healthy. Can you post how to make pasta noodles out of the lentil flour. I'm assuming add water make the shapes and let dry again?? I can't wait to try this out. Thanks again!
Kacey
Wow, I never thought of lentil pasta! I need to give this a try. I have never made it before so I would have no idea where to begin, but given that lentils are really cheap, practicing a few recipes won't cost me much. I will keep you posted!
Rachel
Did this ever happen? I too am looking for a homemade lentil pasta! Tolerant is tasty but sooooo expensive!
Kacey
Sorry, Rachel, I have not tried it yet. However, I finally figured out a birthday gift idea (going to ask for a pasta maker so I can actually get on this!!)
Selle
FYI, Costco now sells Tolerant's red lentil penne. I know they sell it here in NYC, don't know if your location does too?
Dr. Robert John Nicholas
Good for you for doing this. I am using my Ninja and it pulverizes them very quickly. I love seeing parents trying to introduce new and healthy things for their families. Rock on!
Kacey
Yay! Thank you! I hear good things about the Ninja so you are probably having way more success than me 🙂 I think a lot of people do not realize that yes, lentil flour is good for you, however, it has a unique flavour that not everyone will enjoy (much like a lot food!)
Nancy Williams
I have become very carb sensitive so I am trying to find things to boost nutrition, reduce carbs and still enjoy some of the carbs foods that I enjoy. I have just made waffles using cooked red lentils. Now I want to try them with lentil flour. I add cinnamon to help stabilize blood sugars when I eat carbs so this will help to mask the flavour of the lentils. I plan to use waffles instead of pastry for savoury dishes, like chicken-a-la-king, so will add spices that would compliment whatever dishes I plan to make. I look forward to challenging Lentil flour to make dishes I enjoy and keep my blood sugar in balance. Thank you, thank you, thank you!
Kacey
You are soooo welcome! Glad this intrigues you (and yes, trying to mellow out that lentil flour is essential, but I think lentil flour could really produce some awesome meals!) I know one person did not care for the flour in my lentil bread recipe, but then again, it is definitely a unique flavour 🙂
Claudia Davila
Love Lentils, I've had lentil flour pasta it holds such a similar texture to pasta even taste I love this option, I'm sensitive to Gluten and so is my bf he has psoriasis so I make the effort to find new ways to make his fav foods just for him, My question is, "r these dehydrated lentils like fresh out of a bag uncooked? I'm trying to figure out if I have to cook them first n let them stand b4 milling them?
Kacey
I use them straight out of the bag, uncooked. My food processor is not very strong, so I can never break them down fully, however, milling them would probably allow you to breakdown the lentils with little to no waste!
Diana
I'm totally gonna try it. Thank you, Kacey.
May I please ask, if the lentil flour bloats you? I'm wondering if I should rinse and dry the lentils first or use the lentils straight out of the bag. Thanks for you thoughts
Kacey
Hi Diana! I didn't have issues with bloating, but everyone is different. Rinsing and drying would be best as sometimes some fragments make their way into the bag and you don't want to bite into those! You could also soak them (not usually needed, but it may make them easier on the digestive system.)
Olga
Kacey, bravo! What a great idea! Love this.
Kacey
Thank you!
Carol Burgess
This flour has been around for as long as I can remember. People don't know of it because the mainstream didnt sell it. Most farmers made their own, just like any other healthy flour. Any beans and most seeds can be ground into a flour, I have even done leaves, such as lambsquarter, dandelion, and sweet potato leaves.
David Leonhardt
Just what I was looking for! Baulk Barn used to sell red lentil flour, green lentil flour and black bean flour. But this method might be good for creating any flour to balance off the grains in bread, beigli crust or porridge. Fava beans are supposed to be so healthy, yet no flour available? Time to get whirring the food Ninja.
Lee
Looking for a replacement for chickpea flour to make fried pakoras. hope it works well.