During my pregnancy, both Mr. TCW and I agreed that we would not find out the gender of our baby. We didn't care whether the child was a boy or girl (though I really thought the baby was a boy!) as long as he or she was healthy. When they announced it was a girl (after all the nurses were fawning over her and realized they had not revealed her gender to me yet!) I was not too surprised as my mom was wrong when it came to her three children. We knew that even though she was a girl, we would not over-do the whole pink thing. Sure, some pink clothes here and there are fine, but it is a bit ridiculous when your girl's wardrobe is entirely pink at such a young age. I mean, I know some people who seriously had no other colors but pink... Too much for me, so we kind of strayed from the whole pink life.
Then kiddo grew, and she become more vocal. And now we have a fully painted pink bedroom with the demands for a pink birthday cake with butterflies... My child is absolutely girly and I have no clue what to do! My sister is the the girly one, and she has made it no secret that she loves the path kiddo has chosen. I can't even style hair let alone match a particular pair of shoes with an outfit! Oh, how I will learn over the next many, many years.
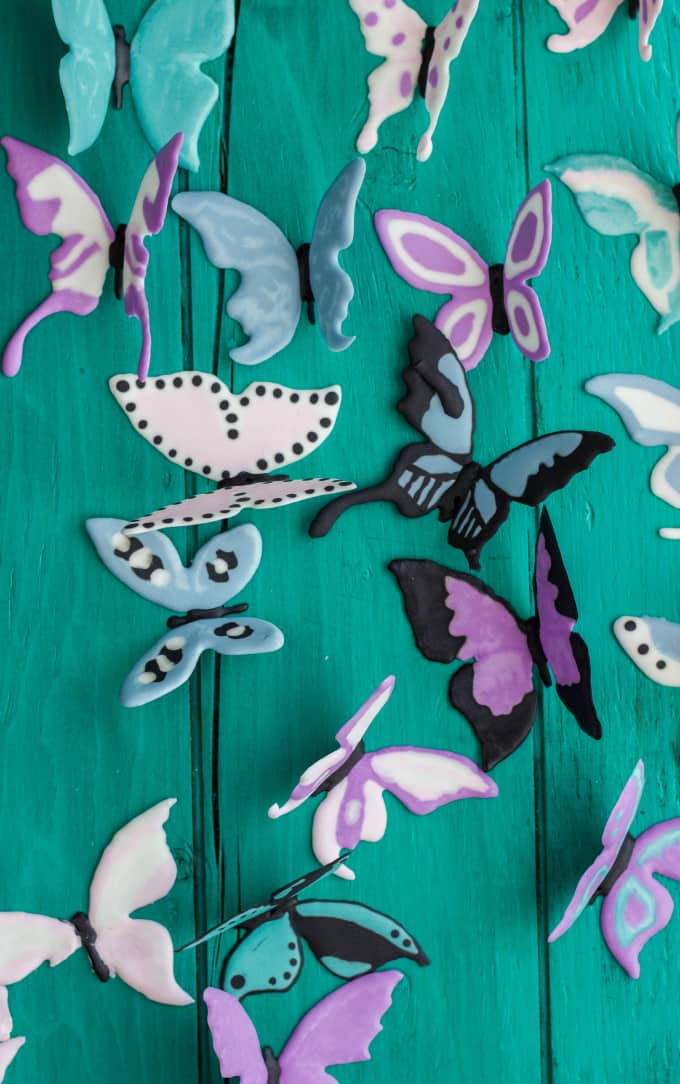
Until then, I will do what I do best. Please her with her requests, and today I will show you how to make pretty royal icing butterflies for any dessert. My best recommendation is to start these butterflies days in advance as they really need time to harden (especially when we shape them so they look like they are flying.) They are quite fragile, so make extra to compensate for any that break.
First off you will need a batch of royal icing. I used Wilton's royal icing recipe for these butterflies, and I wish I hadn't. Nothing wrong with Wilton's recipe, but I have grown so use to Sweetopia's royal icing recipe that I can really notice a difference between the two. If you have your preferred recipe, use it! If using Wilton's recipe, you will really need to water it down. You want a consistency that isn't too liquidity, but not too firm either. Run a spatula through your icing and if the icing joins back together within 5-10 seconds, you are good to go. Any less, it is too runny. Now, for the outlines, you may want a bit of a thicker consistency, but I find I like working with only one batch of icing (after all the coloring and bagging, I don't want to do much else!)
Tint your icing to the respectable colors. I separate the icing into different Ziploc containers, so this way if I have any extra, I can keep it at room temperature, in an airtight container, with no worries of it going bad for the next couple of days. I tend to color my icing a day in advance as the color deepens over time. All up to you!
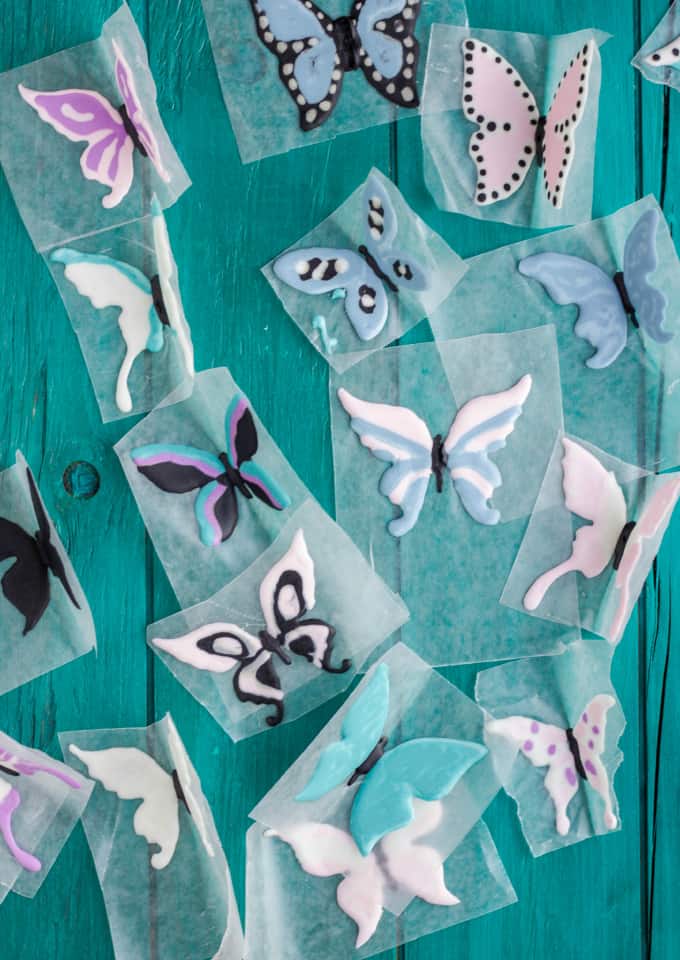
So now to the decorating. Not only are we making royal icing butterflies, but we are making butterflies that appear to be flying! I have seen this book technique on Pinterest and finally got around to trying it. It works perfectly! I found some books worked better than others, so create some test butterflies like I did to see what works best (you can see my black icing was a bit runny the following day.)
Supplies:
Batch of royal icing, tinted to desired colors
Parchment paper cut into little squares big enough to hold your butterflies
Stencil, if needed
Book to hold the butterflies
Toothpicks
Okay, so you have your butterfly stencils picked out (I printed off various free butterfly images from Google onto regular printer paper. I will provide links at the bottom of this post.) Place a piece of parchment paper on top of the stencil. It might help to weight the parchment paper down because even the littlest breeze from your mouth or nose will move the paper. Take your piping bag full of icing and begin piping, following the outline of the stencil below the parchment paper. This is where you can get creative. You can outline the butterfly in one color, or use multiple colors. Just make sure you only outline the wings and do not include the butterfly's body. That comes later. Once the outline is made, give it some time to dry (especially if it is black because chances are the colors will bleed together,) Once ready, begin filling the insides of the butterflies. I use a toothpick to help bring the icing to the edges, as I find I have more control this way. You can also use the toothpicks to create cool hearts and swirls in your butterflies! Set the butterflies aside to fully harden on a flat surface.
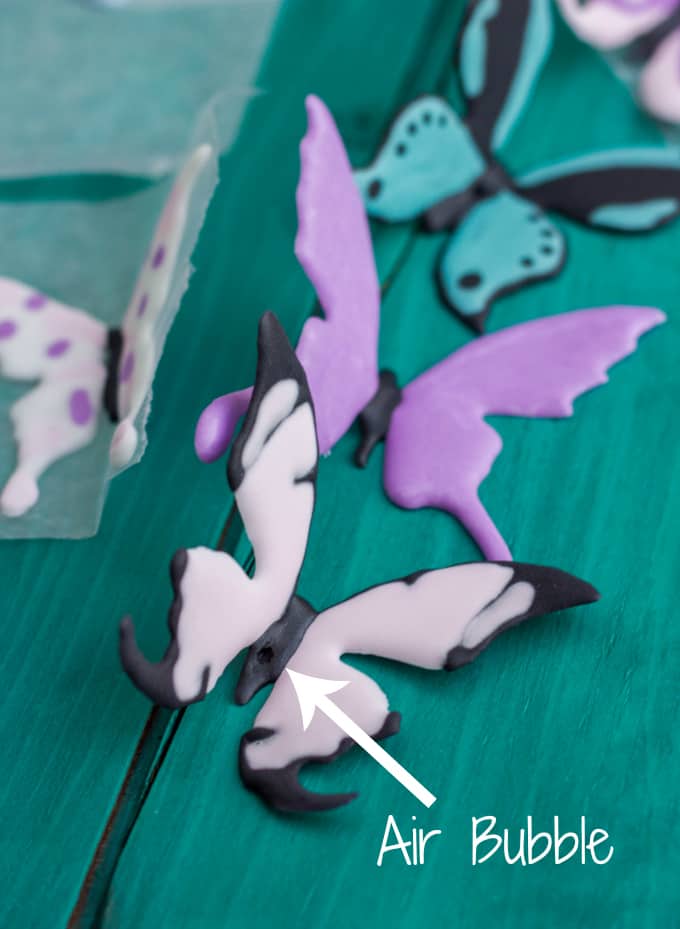
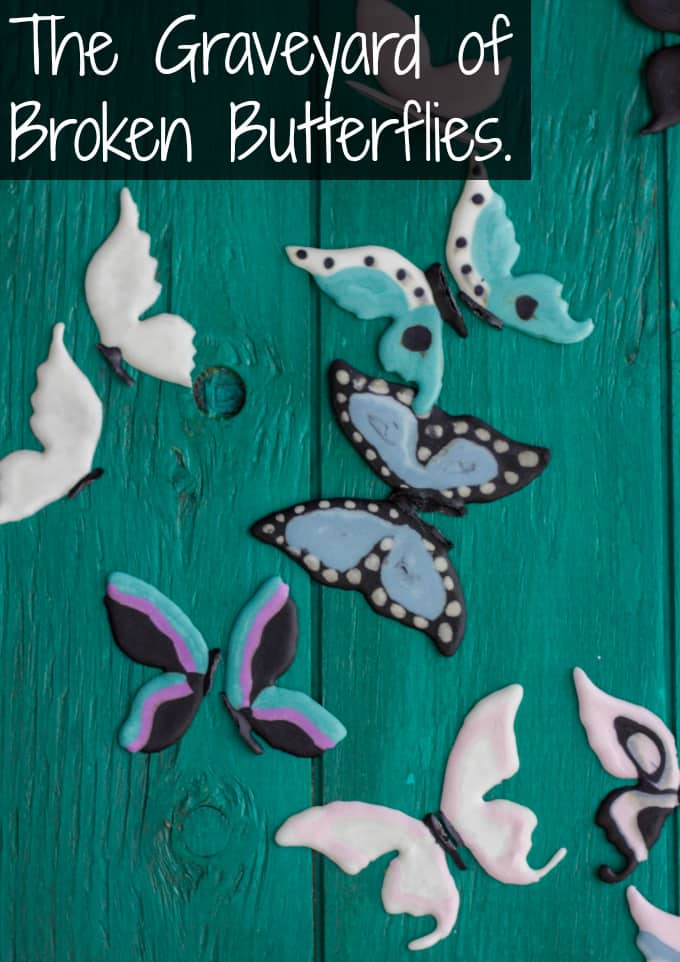
This will probably take 24 hours. Until then, I wrap my piping bags with the tips still on, with a damp paper towel so keep the royal icing from drying up. On another note, you may hit some other obstacles. As you can see above, my favorite butterfly developed an air bubble that I missed, so when the body was drying, the bubble popped, resulting in that hole. Another reason to make extra butterflies, but I love him too much not to use him!
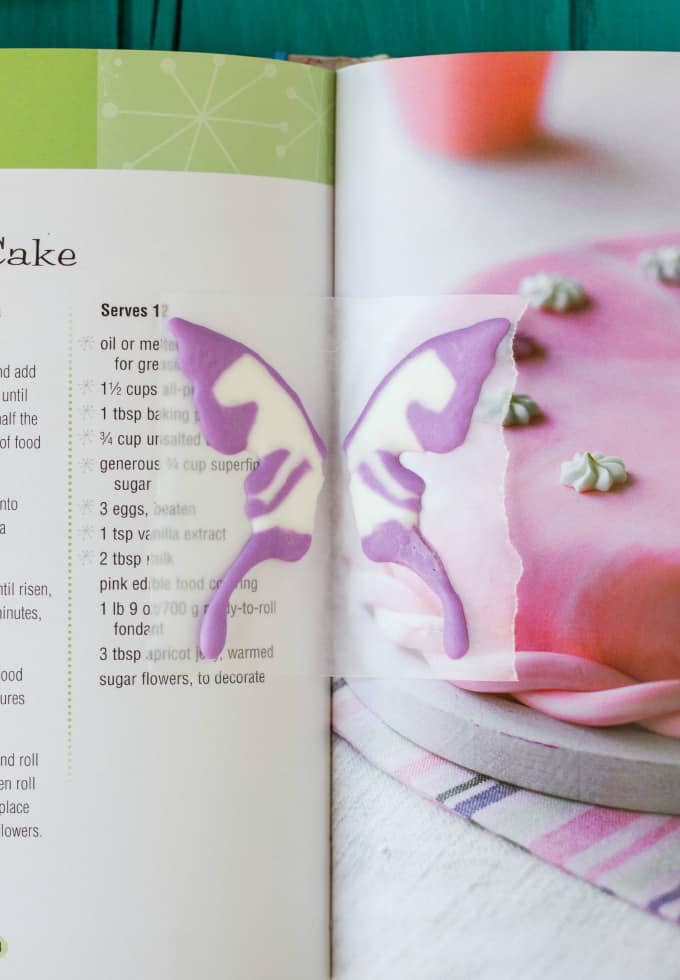
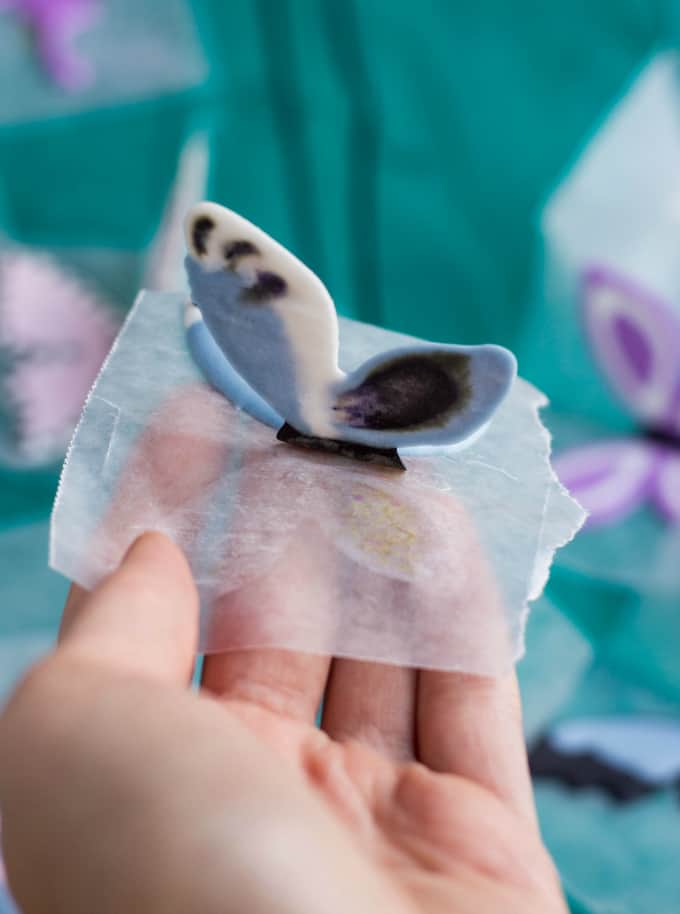
Now we are going to create our "flying royal icing butterflies!" Grab your butterflies, still on the parchment paper, and pipe the body in-between the wings. I found this easier to do on a flat surface and then move to the book, but you can place it in the book first. Once piped, move the butterfly so the body rests in the seams of the book and the wings spread out on either side. Adjust accordingly on how pronounced you want the wings to be in flight mode.
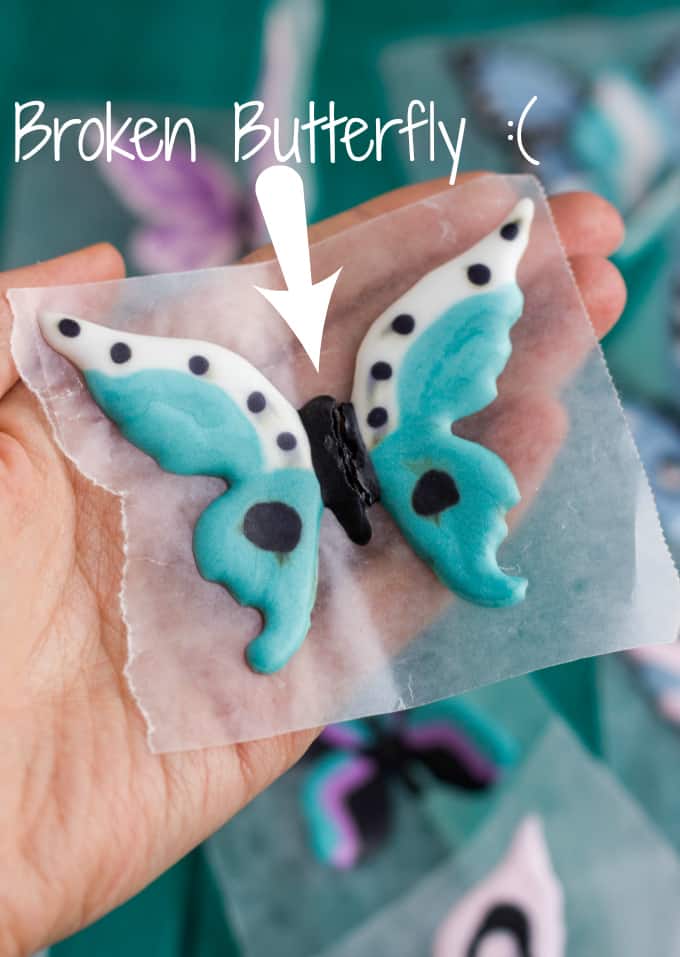
Allow to sit for another 24-48 hours (I found out the hard way that they will break if not completely dry.)
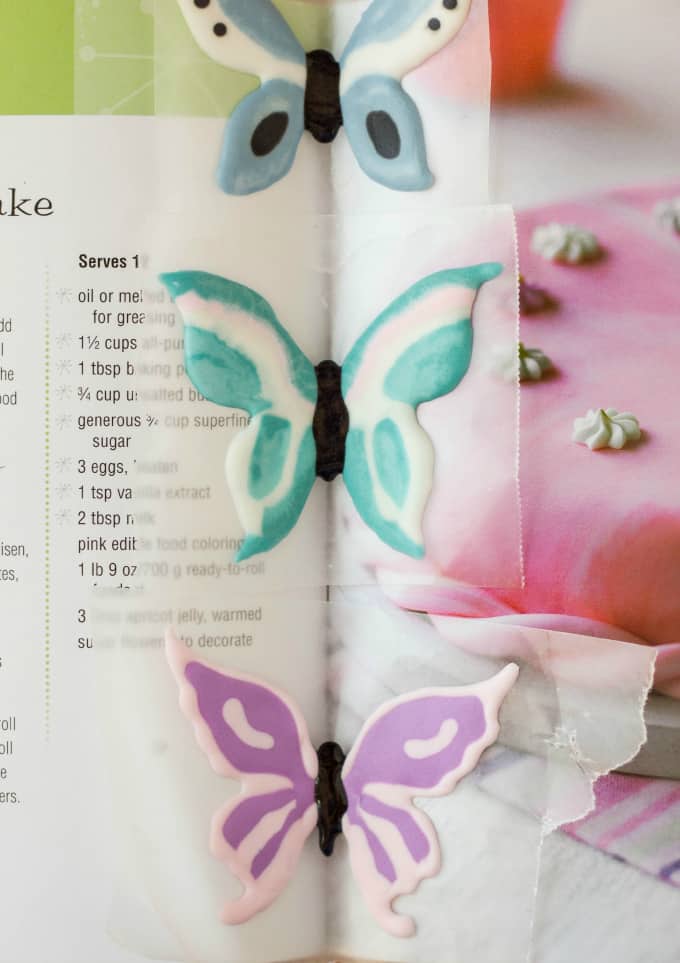
Once dry, carefully remove the royal icing butterflies from the parchment paper and voila! You have some beautiful royal icing butterflies! Mine will be placed on a pink cake for Girlie's third birthday coming up this weekend. Be sure to check back to see the final cake design!!
Link to butterfly stencils found here.
Katie
Thank you for this tutorial. I don't have the money to get the pre-made ones and my daughter wanted a butterfly picnic for her 5th birthday with cupcakes!
Kacey
So glad to help out! Homemade is more special, too 🙂