Welcome to part 2 of our stairway remodel! If you have not already, please check out part one.
Now, after seeing all the dust everywhere you might be thinking "good thing that dirty work is out of the way." Wrong! If our treads had been hardwood, we would have sanded them down and moved onto staining and painting. However, because of the pressboard and plywood treads, we have a little extra work ahead of us. Before we go into detail about cutting and installing the new treads and risers, I want to share with you how we went about staining the treads and banister railings.
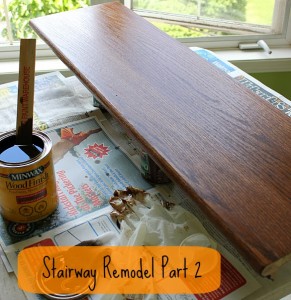
While Mr. TCW was doing all the dirty work of removing carpet, cutting off bullnoses, etc. I was left in charge of staining. Now this was a bit daunting because I had never stained anything before! Coming across many tutorials on stairway remodels, I was surprised at how many other people had no experience like myself. What seemed promising was how successful their projects turned out. Just in case though, I made sure to read up on staining and ask some experts (aka, my father-in-law.) He told me it is super easy and recommended his method which is to use cheesecloth. Aside from that tip he basically said it is up to you how you want to go about staining. Some people do multiple coats, some leave their stain on for 5-10 minutes and then wipe away. He said he would put his stain on and wipe away immediately, and very rarely had to do a second coat.
Let's begin!
Supplies (for this chapter):
Stain in your preferred color (I went with Minwax English Chestnut)
Cheesecloth (or a brush, old rag, etc. Whatever you apply your stain with.)
Stir stick
Disposable gloves (I bought a case of 100 from Home Depot)
Sander with 60 grit, 100 grit, and 220 grit (or really anything you have on hand.)
Sanding blocks in similar grits
Dust mask
Painter's tape
At this point in the project we had to ship Girlie off to my mother-in-laws. Too many dangerous tasks on the go to even have her in the house. Rex hung out in the garage and yard while I worked; this kept him from the fumes. I did some staining in the house and the rest outside in the garage. In both cases I made sure I was in well ventilated areas with windows and doors wide open.
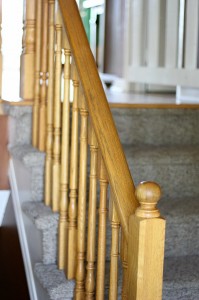
First step. Remove banister rails and spindles (if necessary.) I mean, you could leave them up and stain them from there but with all the nooks and crannies, it might be easier to remove them. Plus, I had this nifty part that needed to be stained and the only way I could do that was by removing the spindles.
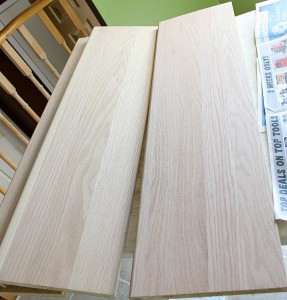
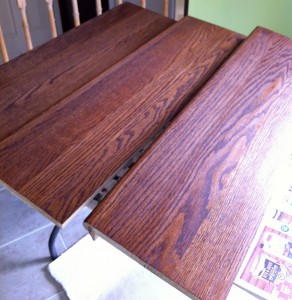
The bright side of this project is that the stair treads come in their natural state. I still went over them lightly with 220 grit paper just to smooth out any roughness but for the most part they were in really good shape. When you have completed this "fun" task, make sure to wipe down every piece to remove any excess dust. You can use Lysol or baby wipes for this. Now is the time to get your work station ready (and in my case that was an old work table set up in the kitchen, covered with newspaper.) Outside, I made sure the dust had been pushed aside and I had ample room to lay out the banister rails once they were stained.
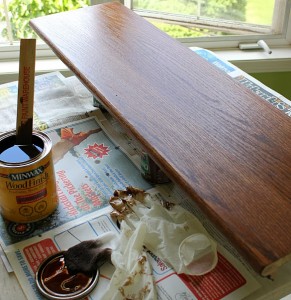
Now it is time to stain! Read the instructions on your can of stain first to become familiar with their methods. When you open the can, you want to gently stir the contents. DO NOT SHAKE. This will cause bubbles that will ruin your finish. Just a nice, gentle swirl. Also, if you are staining a lot of pieces, try to remember to give a gentle stir every couple of pieces because the stain will start to settle from lack of use.
Put on your disposable gloves and mask. The fumes weren't horrible but when you start to get within nose level of the can, the fumes can start to get to you. I cut two, fair sized pieces of cheesecloth into squares and folded them in half twice. This gave me two separate square pieces, one to dip into the can and the other to wipe away the excess stain. Now technically, like any good painter does, you should pour the stain into a separate container to eliminate the chances of debris going into your can but I was super lazy and skipped this part.
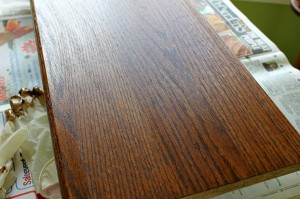
Taking one square cheesecloth, dip it into the stain, perhaps half an inch to an inch in length. A little goes a long way!! Apply the stain in long sweeping movements with the grain, from one end to the other. You may have to dip the cloth again but you should see the wood soaking in the stain instantly. It is so beautiful 🙂 Once the entire tread is covered, allow the stain to sit for a desired time (I tested a small piece of wood earlier and determined 5 minutes was enough for me.) Once the 5 minutes has passed, use your second piece of cheesecloth to wipe away the excess stain, going with the grain again. Carefully move the tread to a safe place to dry and repeat with the remaining treads. I did one tread at a time but you could easily do 2 or 3, it is whatever you feel comfortable with.
Tips:
All wood is different. When it comes to soft woods, it is recommended to apply a wood conditioner on the wood first to ensure even coating of the stain and it reduces the risk of blotches.
Stain always appears darker when it is first applied and wet. When you wipe off the excess stain, you are going to come out with a lighter shade. This is why people generally add another coat of stain (after allotted drying time) to their pieces. In my case, the wood absorbed the stain so well I was very pleased with the rich, dark brown color. However, I really, really wish I had done more coats on my rails and balusters. The wood was a different type from my treads and did not take the stain as nicely. Everyone who has seen my rails loves them but I notice the flaws.
This being said, make sure to follow the dry time instructions carefully before adding your next coat of stain.
*IMPORTANT: When disposing of staining supplies, follow the instructions! They can spontaneously combust so make to soak supplies in water or mineral spirits and dispose of immediately.
Now, you are probably wondering why I decided to stain the treads before installing them onto our staircase. This was the father-in-laws recommendation. Right now you can apply the stain from one end to the other, leaving behind a perfect finsih. If you installed them onto the stairs in a raw state and then stained them, you would have to worry about the side trim getting covered in stain, along with the risers. It was just easier to do it this way. However, I did apply the finishing coat of Varathane after we installed the stairs. We were not concerned about nail holes because we were screwing the treads in from underneath our staircase (we are lucky to have access under ours.)
You will not be installing the treads tonight since they need to dry. I moved onto staining the rails and balusters in the meantime. This was a bit more time consuming because once you applied the stain, you had nothing to really grip onto when you went to wipe the stain off.
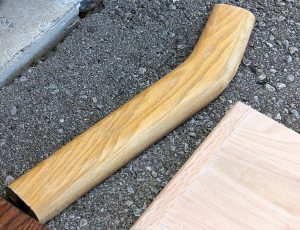
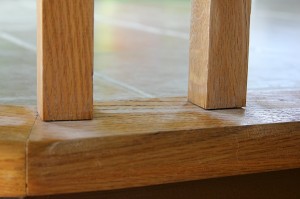
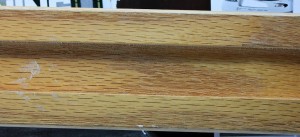
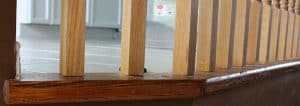
See that little piece above? Imagine covering it in stain and realizing you cannot grab it because you will ruin your new finish. Mr. TCW came up with a genius plan! When I flipped my piece over it had a little indent where wall support sat. And what fit perfectly into this small space?
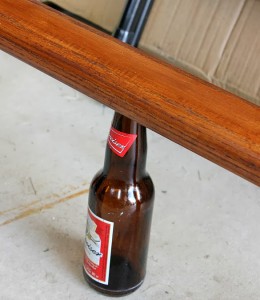
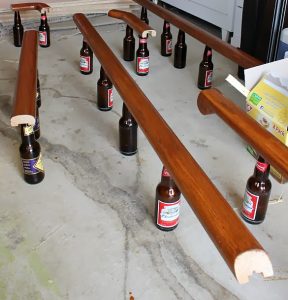
Pretty good use for those empties laying around! I spread the bottles out evenly and ensured the rails were sturdy enough for me to apply stain. I held onto the underneath portion of the rails when wiping away the stain. There was one incident where a piece fell over but it was easily fixed. It may be hard to tell here but the finish on these rails is lighter than my stair treads but still a nice color.


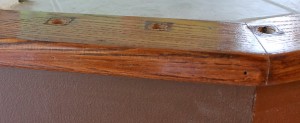
You can see where the spindles were resting before but don't worry, they will re-cover any of those flaws. And there you have it! I think I got all the staining done in one day. I may have done the downstairs treads on a separate day but we knew that installing the treads was going to take a couple of days so there was no rush to get both sets of stairs done at once. It is a lot of work and don't think the hubby was sitting around doing nothing. At this point he was measuring, cutting, figuring things out. I know this sounds like I am trying to scare people off from tackling this job and I don't mean to. It was a lot of work but the results are well worth it (which will come eventually!)
Part 3 is now up! This will discuss the installation of the new stair treads and risers and maybe my grand adventure of working with dozens of spindles.

Leo
Oh wow! This is exactly what we are contemplating doing so thank you for taking the time to take pics and the commentary !