Welcome to my stairway remodel adventure! Make sure to take a look at part one and part two to see how we ripped out our old carpet and went about staining the new stair treads.
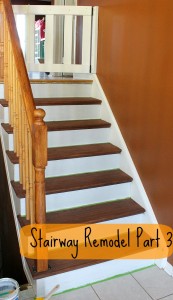
So... We meet again! Are you excited?! I mean, I am excited because every time I write a post about our stairway remodel I know we are one step closer to completing the project. There is nothing worse than starting a new project when you have one on the go. But do I wait until I am completely finished a project before I move on? No! Haha, I am terrible but I find so many neat ideas and I cannot help myself. I will admit though, this project went a lot faster because I knew for safety reasons we had to get this project done. I did not need everyone coming over on Girlie's birthday and falling down the stairs!
One of the biggest slowdowns during this project was waiting for the stair treads and risers to be installed so I could paint and Varathane them. I pre-stained my stair treads which helped but could not put the protective coating on until we installed them (because we would make nail holes that would need to be filled in with wood filler and than touched up with stain.) We ended up changing our installation method so in the end I guess I could have put on the Varathane a head of time but oh well, you learn from your mistakes.
Supplies (for this chapter):
PL glue (we used 3-4 300mL containers)
Wood glue
3.5 inch screws (sizes may differ for your project)
Wood Bore
Power drill
Finishing nails
Philips screwdriver
Table saw
Remember in my previous post I pointed out how my spindles were attached straight through my stair treads? That added an extra couple of steps for us. Yay! Yeah, no, it was not fun. We removed the spindles using a Philips screwdriver. Using the flat head we slid the edge of the screwdriver underneath the spindle and gently wiggled it until we could feel the spindle moving. Then we twisted and tugged until we pulled the spindle out. Basically the bottom of the spindles are round, about 2 inches long (I am guessing here) and had no threads. Repeat this for all the spindles. Now, obviously since you removed these spindles, you are left with holes through the pressboard/plywood. That means in order for our new stair treads and spindles to line up, we need to measure these exact same holes and drill them through the new treads. That proved to be super easy and I will explain in a moment.
Before we could start drilling, it was time to install the new treads and risers! The first problem that occurred? We realized that the tread and riser kits came with one tread and one riser. However, any staircase is going to need one extra riser because you may have 6 stair steps but there is always one more riser attaching to your main floor... Yup, that extra riser was not included and Mr. TCW had to run to Home Depot to buy one. Unfortunately they only had a plywood or pressboard piece (which is fine, I was painting all the risers anyway.) We made sure to put the non-hardwood riser anywhere but the bottom because we felt that riser would take the most beating from shoes and boots.
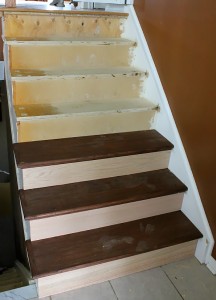
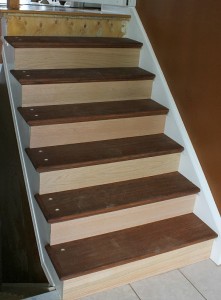
Pushing that slight mishap aside, the installation was a breeze. Beginning with a riser, we placed it against the old riser and measured accordingly. Then we cut the riser on our table saw and doubled checked to see that it fit. Next, Mr. TCW and I worked together. We quickly lined the back of the new riser with PL glue, squiggling a line across the board about an inch from the edges, ensuring even coverage. You really want to make sure you have enough on there because it is all about safety at this point. However, do you do not want it to squeeze out from the edges because this stuff is heavy duty and will not come off easily, if at all. Even though we were screwing the risers and treads in, we wanted the extra glue support. Working quickly, I pushed the riser up against the old one and Mr. TCW fastened it on securely from underneath the stairs. He pre-drilled the holes so there would be no splintering and when it came time to drill the screws in, I made sure to apply ample pressure to the riser so it would fit nice and tight against the old riser. We put in 5 screws per stair riser and tread. The picture below will help show you what I am talking about. We are so lucky to be able to access underneath our stairs.

See those screws? They are long enough that they fit through the original pressboard stairs but short enough that they did not pop through the new stair treads and risers. We gave ourselves about half an inch of play just to be safe. I think I would have cried if a screw had popped through our new stairs... This is where LOTS of measuring came in. I suck at math, I won't lie, so this was allllll number one husband!
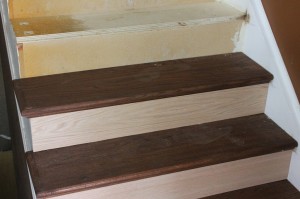
We repeated the same procedure for the stair treads. Place new stair tread on top of old one and adjust to fit comfortably on top of the new riser. Measure and cut to fit. Repeat the same process with the PL glue and place down securely. On these stair treads, I sat on top of them while Mr. TCW drilled in the screws so we were guaranteed a tight fit. All screws in this project were pre-drilled. Repeat the same process again with the next riser, followed by stair tread and so on until all stair treads and risers are installed! Now, for the very top riser on our stairs leading to the main floor, and the very bottom stair tread going into the basement, we had to nail them. There was no room to fit the drill to screw in these pieces. No worries, I can barely notice the nails on my stair tread downstairs so I did not bother filling them in with wood filler. I heard about people having problems with the stain taking to the wood filler and not matching with the rest of the tread.
Wow, are we done yet?! Let's attach the spindles! Oh wait, there were holes there before but now they are gone... Thankfully this was super easy. Mr. TCW went under the stairs and found the old holes that were pre-drilled from the builder. Using a drill bit of his own that matched the circle diameter perfectly, he drilled upwards in the hole so that the centre of the drill bit would pop out the top of our treads. Just enough for us to see where the centre of the hole was.
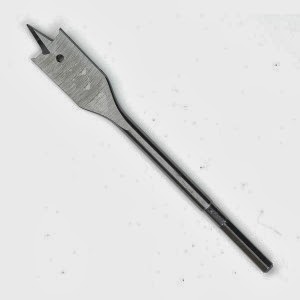
I am sorry I did not take pictures here, I hope that makes sense. Once you see the drill mark, we attached a wood bore to our drill and cut out our new holes from the top of our stair treads. I can't remember our exact diameter but since we had access to the holes underneath we knew we had the perfect match. It was quick and easy, probably the fastest part of the entire project.

Dave
Never finished?
Kacey
Ha, I think we would be in trouble if it was never finished! Part 4 is up (though a lot has happened since that post such as change of wall paint, caulking edges, and the laminate upstairs being replaced with hardwood so we now have a proper wood edge at the top.)