Oh man. There is a reason I do not make cakes professionally.
Let me start off by saying I was very un-Disney-like in terms of language. I cursed at my husband when things went wrong (which was not during the baking process at all!) It was my own fault, but I was super frustrated as we were due to deliver the cake in less than an hour and my cake was falling apart. More on that later.
PS. Remember to check out my double chocolate cookies for a chance to win 20 bags of Hershey's chocolate chips!
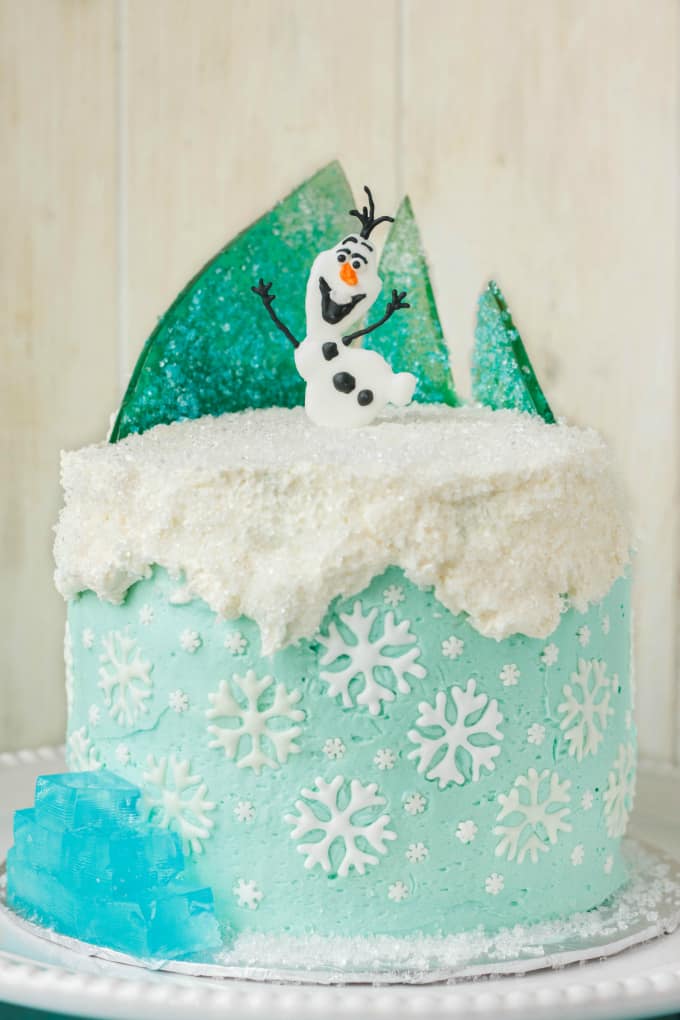
I have to admit that this Frozen theme cake turned out pretty close to what I envisioned it to be. It was a lot of work, but I really wanted to please my friend, Tammy. Well, I should have been wowing her daughter, as it was her third birthday, but let's face it, at that age, all the kid cares about when it comes to cake is whether it tastes good! And it did taste pretty darn good, I must say! I usually never have the opportunity to eat my cakes because I am always sending them to work with my husband for his coworkers. At least this time I could actually grab a piece (I am sure he would bring me home a piece but it is so much of a hassle. Plus, I make enough dessert as is!) Everyone was happy, and I was proud to please the birthday girl!
Now, I had this brilliant idea to make the cake the night before. I didn't mind because I knew the party would be in the early afternoon, and chocolate cake tends to hold moisture pretty good. I set about baking the layers of cake.
Mistake number one: I usually halve my standard cake recipe because it makes a TON of cake. I completely forgot to do this and soon realized that I would indeed have five 6-inch chocolate cake layers instead of three. Sigh. That's okay, I used 3 layers for this cake and froze the remaining two. I can always make a small cake with the remaining layers.
So after that realization I moved onto the sugar glass.
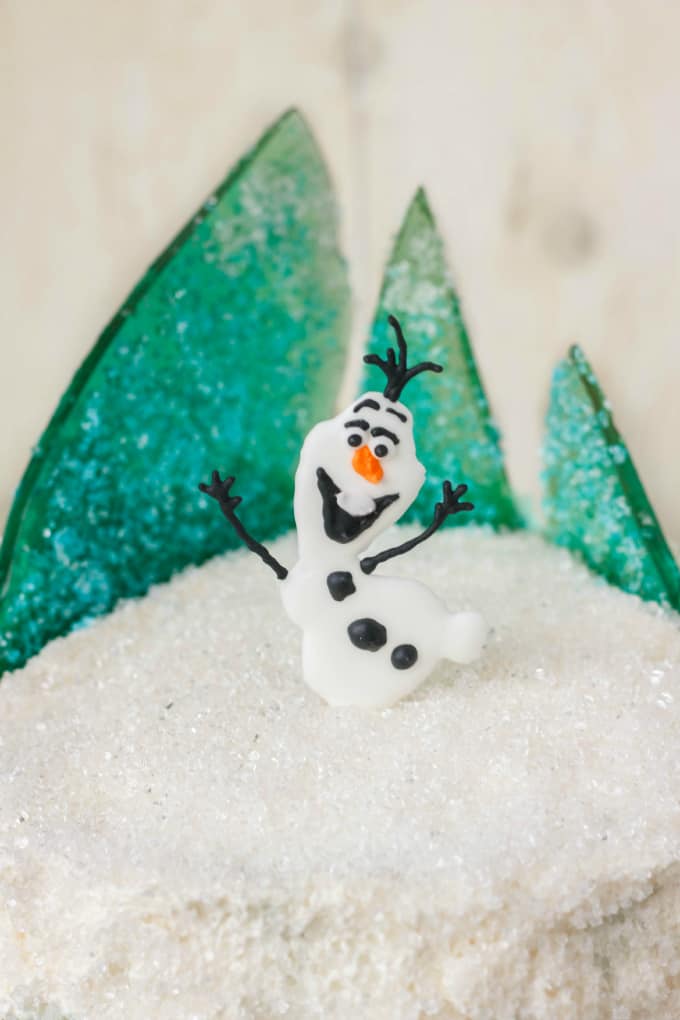
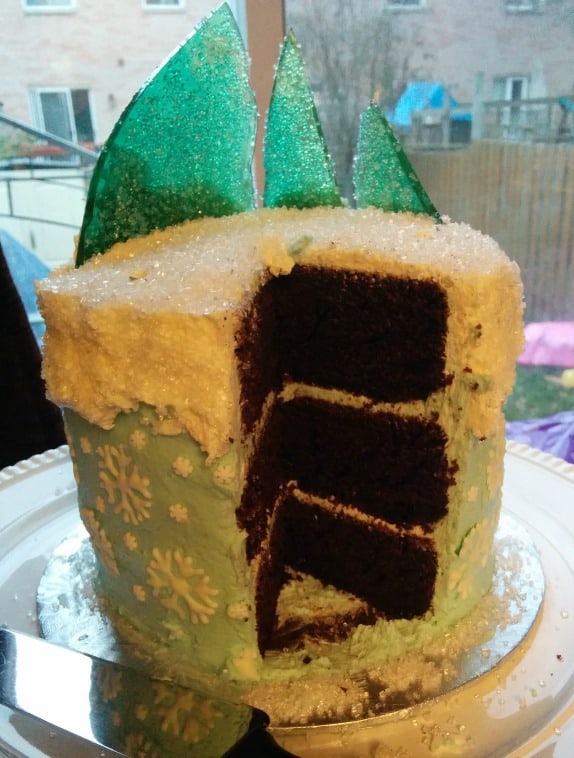
Mistake number two: I added the blue food coloring drops you find at your local grocery store. I added 3-4 drops and the color was perfect. Matched perfectly with the Frozen teal blue color. As the mixture continued to boil and the sugar dissolved, I noticed the color changing drastically. I kid you not, when the sugar was closing in on the 300F mark, the mixture was no longer blue, but a forest green!!! What?!! Ahhhhh! I added some more blue food coloring but was really concerned about my sugar seizing. I poured out the mixture and then quickly added some more blue food coloring randomly. Then I used a spatula to quickly swirl the blue in, almost creating a two-tone effect. I still saw green but thankfully a lot of the blue was pulling through. In the end I decided to cover the sugar glass with decorative blue sugar to help hide the green color. Yeah, so just a heads up, your blue may change to green. My advice? Either add way more blue food coloring to begin with or use Wilton's royal blue. I am going to try Wilton's colors next time.
Moving on from that experience, it was time for the buttercream. Thankfully that worked out perfectly. I made up the buttercream and removed some uncolored icing for the snow top. Then I added Wilton's teal food coloring to the icing in small increments until I reached my desired shade.
Next came the assembly. I layered accordingly, and then started from the bottom of the cake and worked my way up with the teal icing. I covered right up to the top of the cake, without going onto the very top surface. I smoothed the icing the best I could but then thought a rough icing coat would look more realistic to "snow." When it came to placing the "snow" onto the cake, I just dumped the white icing on top and smoothed it over the edges roughly to resemble snow hanging over a hill or mountain top. I actually really like how that rough snow look turned out. Then came the hard part.
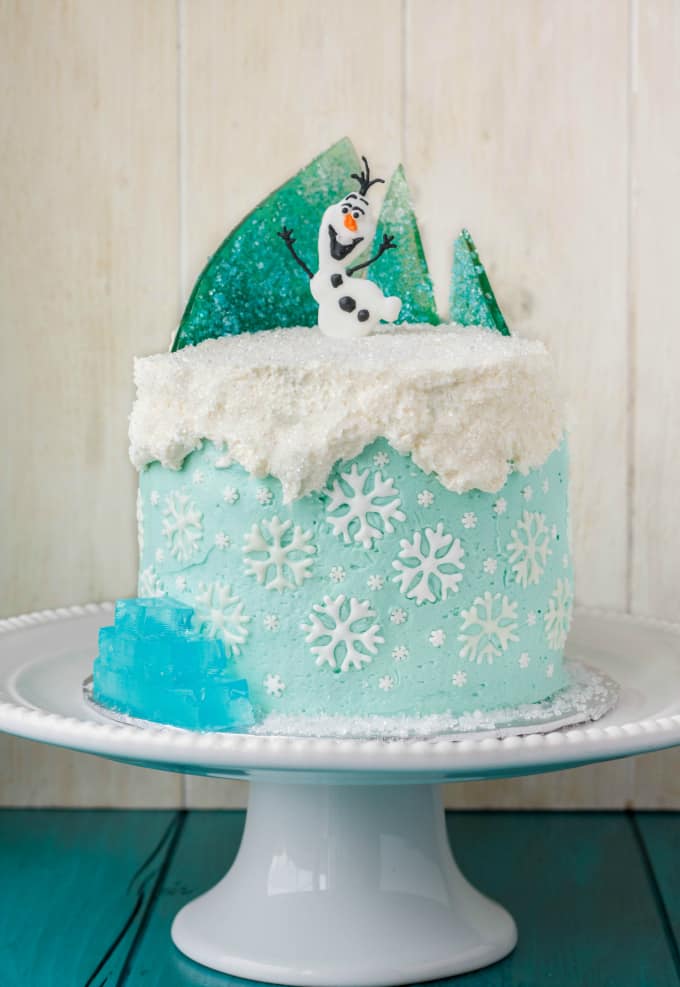
Mistake number three: I put white decorating sugar on top of the cake to resemble snow/ice crystals. I was worried about the sugar getting onto the teal part, so I folded up some construction paper and tried curving it around the falling snow. Then I dumped some sugar crystals onto the paper and tried angling them onto the snow. Yeah, all I succeeded in accomplishing was pushing construction paper into my teal icing, resulting in me having to re-smooth. I just decided to push the sugar into the icing from a ramekin dish using a pastry brush. Extremely messy, but effective (seriously, there was more sugar on the counter and floor then there was on my cake.)
This is where I should have stopped. But noooo, I was so happy with the results, I wanted to see the completed cake! I have no patience. I kept having doubt in the back of my head but I pushed forward.
I placed the sugar glass into the cake first. It was really heavy and breaking my cake so I cut slits into the top of the cake to fit the glass better. Then I piled a ton of icing behind them to help hold them up (I had no dowels.) I placed all the snowflakes on and was so pleased with my results. Until I remembered something...
Mistake number four: Royal icing and buttercream do not mix. AHHHHH! It was not long before I saw my snowflakes fading and absorbing the grease from the buttercream. Thank goodness I did not put Olaf onto the cake because of the 6 I made, only 1 did not break in my process of removing them from the parchment paper! I left the cake for the night and decided to fix it the next day.
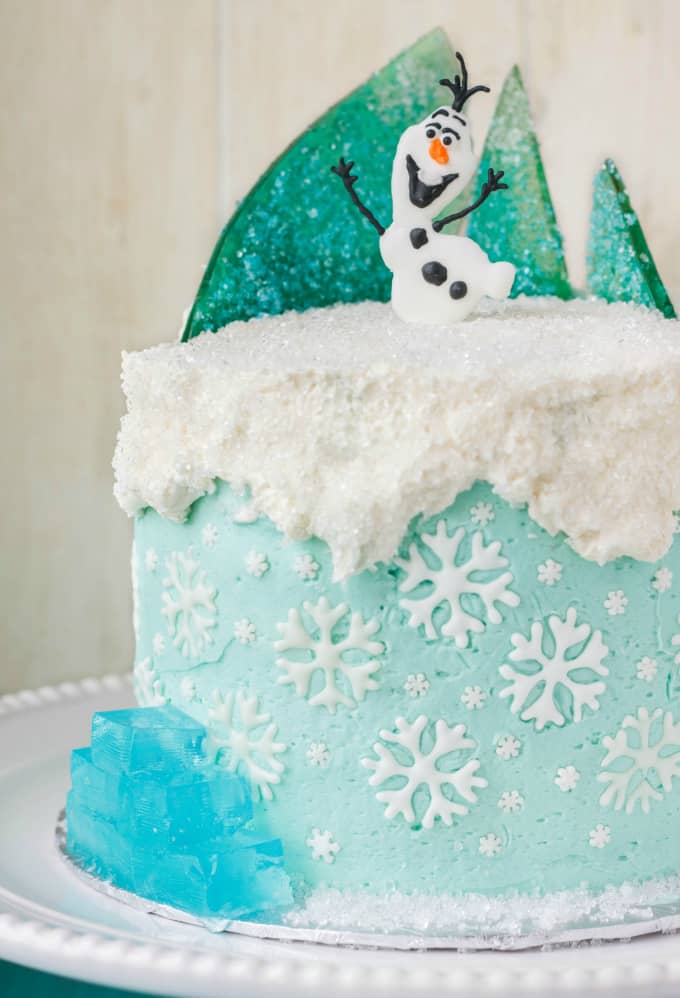
Mistake number 5: I should have just left the snowflakes as is. They were not as vibrant white as before but they did not look awful. Instead, I decided to remove 3 snowflakes at the front of the cake and replace them. This resulted in me leaving a ton of nail marks in the cake trying to remove the snowflakes. Half of my extra snowflakes broke as I tried to apply them to my crusted buttercream. I was getting VERY upset. And that's when I swore at my husband. Poor Mr. TCW, I did not mean to. I never curse! But I was so upset, I wanted to make this cake look perfect. In the end I only replaced the three snowflakes and said forget it. I put Olaf on and the Jello ice cubes, quickly took some photos, and dashed out the door.
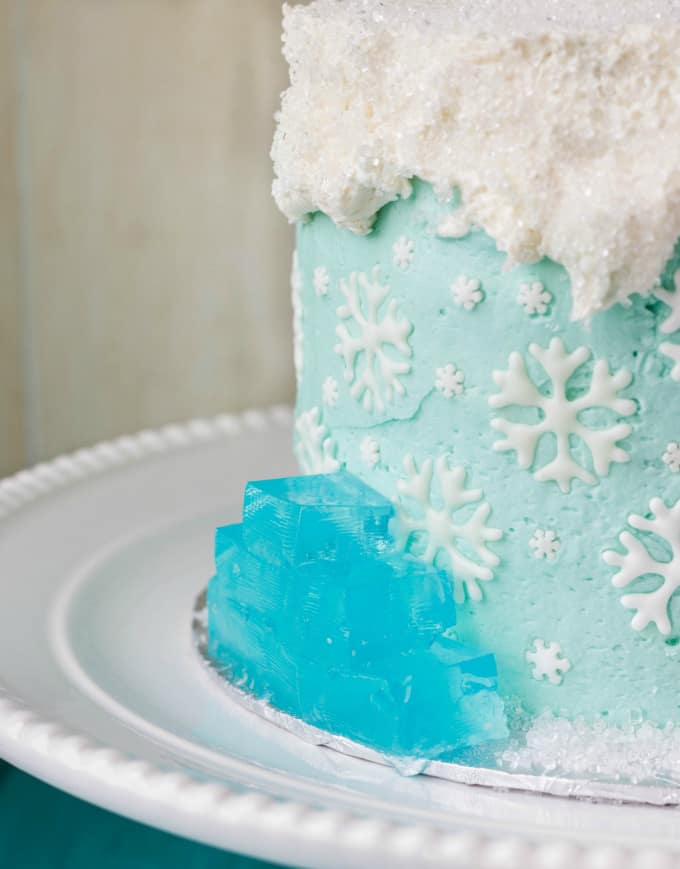
I was so worried about Olaf breaking during the truck ride, but he survived! Even the strong winds caught him and he did not break! However, my Jello totally melted in the car... That was okay, it was not a big part of the cake, but I would say next time, I will just surround the cake board with the Jello.
And there we have it! All the things I learned with one Frozen theme cake! Be patient, have fun, and do not rush the job to try and get pictures in before you lose all natural light... Worst part is, I know Tammy and her daughter couldn't have cared less if there were faults with this cake. They were extremely happy with what I made them and I was happy to do it!
📖 Recipe

Frozen Theme Cake
A Frozen theme cake fit for a big, or little, birthday! Whether you are turning 5 or 55, this Frozen theme cake is perfect for any Frozen fan.
Ingredients
- 2 cups all-purpose flour
- 1 cup cake and pastry flour
- 2 cups granulated sugar
- ½ cup brown sugar
- 1 tbsp. baking soda
- ¼ tsp. salt
- 1 cup unsweetened cocoa powder
- 1 ⅓ cups canola oil
- 1 ½ cups buttermilk, room temperature
- 3 large eggs, room temperature
- 1 ½ cups hot coffee
- 2 tsp. vanilla
Instructions
- Preheat oven to 325F.
- Prepare your cake pans (I use 6-inch pans, filling each with 1 ½ cups batter for a total of 5 layers) by spreading vegetable shortening lightly all around the inside of the pans (make sure to get up the sides.) Add a tbsp. or two of flour and rotate the pan until the flour has dispersed all over the shortening, gently tapping out any excess flour. If you see any spots that don’t appear to be covered, reapply the vegetable shortening and cover with flour.
- In the bowl of a stand mixer, sift in the flour, baking soda, salt, and cocoa powder. Pour in the sugar. Combine, using the paddle attachment. While the mixer is on low, add in the oil, buttermilk, and eggs (one at a time.)
- Gently, and slowly, pour in the hot coffee. I find when I get about half the coffee in, it starts splattering out of my mixer (even with a Kitchen Aid cover!) Either cover your mixer with a towel/cloth, or stir the rest of the coffee in by hand. The batter appears really liquidity but do not panic! Stir in vanilla until combined.
- Pour equally into each pan, about 1 ½ cups each. You only want to fill the pans to the halfway mark. This recipe will make five, 6-inch round layers (I only used three layers for this cake and froze the remaining two layers.)
- Bake for 30-35 minutes, or until toothpick comes out clean.
- Put hot pans onto cooling racks and allow to cool until you can pick up the pans with your bare hands to flip the cakes out (roughly 20 minutes.)
- When you can flip the cakes out, allow to finish cooling completely on the racks.
Nutrition Information:
Yield: 15 Serving Size: 1Amount Per Serving: Calories: 475Total Fat: 23gSaturated Fat: 3gTrans Fat: 0gUnsaturated Fat: 19gCholesterol: 42mgSodium: 391mgCarbohydrates: 61gFiber: 2gSugar: 37gProtein: 6g
I will post the links to the Jello ice cubes when I put up the blog post. For the sugar glass, check out my Halloween cupcakes and follow the steps exactly, but use white corn syrup and blue food coloring instead. We want a Frozen theme cake, not a bloody massacre as seen with those cupcakes!
For Olaf, I made him out of royal icing a couple of days in advance. I did him freehand but will show some step-by-step photos in another post (I took the photos with my phone, but it will show you how I layered him.) The large snowflakes were also done by me (template found here.) The little snowflakes I found at our local bulk barn here in Canada. I used my vanilla buttercream recipe and added some white food coloring to get rid of the ivory tone from the butter.

Alison's Wonderland Recipes
Don't feel bad about the green ice-- I actually came by to comment specifically because I saw a picture of your cake and thought, "Wow! That ice looks SO cool. The green makes it look like deep ocean ice!" 🙂
I almost had a dessert fail last night too. I was making honey candy for my dad but didn't have a candy thermometer (what would possibly go wrong?). I tried two different times, and each time it wound up caramelizing. Now he's getting chocolate-dipped honey caramels, which actually taste pretty good. Three cheers for food fail recoveries!
Kacey
Haha, the life of food bloggers! Almost like those contestants on cooking shows whose meal isn't working out and they throw in the term "deconstructed."
Saisha shah
Which brown sugar did you use?
Kacey
Light, golden, or dark will all work fine. I happened to use golden brown sugar this time around.
Alex
Hi, I just want to say that I love the fact that the sugar ice pieces are greenish and by reading your experiences it felt like I was reading my own journal. I am the same, always impatient and perfectionist, always on the verge of ruining my cakes. I always think it's going to be a disaster until the very last touch and somehow it all comes together. Lol.
Kacey
Thanks so much for stopping by, Alex! My husband cannot believe I enjoy cake baking because I always look frustrated and defeated, lol. I guess I am like you who has to see the final touches to feel truly satisfied!